Storyboards: Visually Plotting Your Novel (+ FREE PRINTABLE TEMPLATE!)
I’m just going to say it . . . I’m a plotter. It’s something I’ve discovered about myself through my writing journey. For me, plotting my story out ahead of time makes writing the first draft a LOT easier. I’ve done different things to plan my story. I’ve made notes, written outlines, and even drew storyboards.
So this brings me to today! Visual storyboards do something that outlines can’t; they help you to actually see the plot points for your story.
When it comes to storyboards, there are a few different ways to create them. I’ve seen some done with sticky notes and some with drawings for the scenes (I feel like, however, that the drawing type is used more for filmmakers, but if you like drawing [or don’t like drawing but just want a visual], writers can use them too!). There is no one set way to make a storyboard. You can make them however you want! The main purpose of your storyboard is simply to help guide you as you are planning your novel. In this post, I’m going to show you what I’ve done for my storyboards so far. I’m a visual person, so seeing the main points for my novel rather than reading a bunch of notes help me get a better idea of what’s going on in the story.
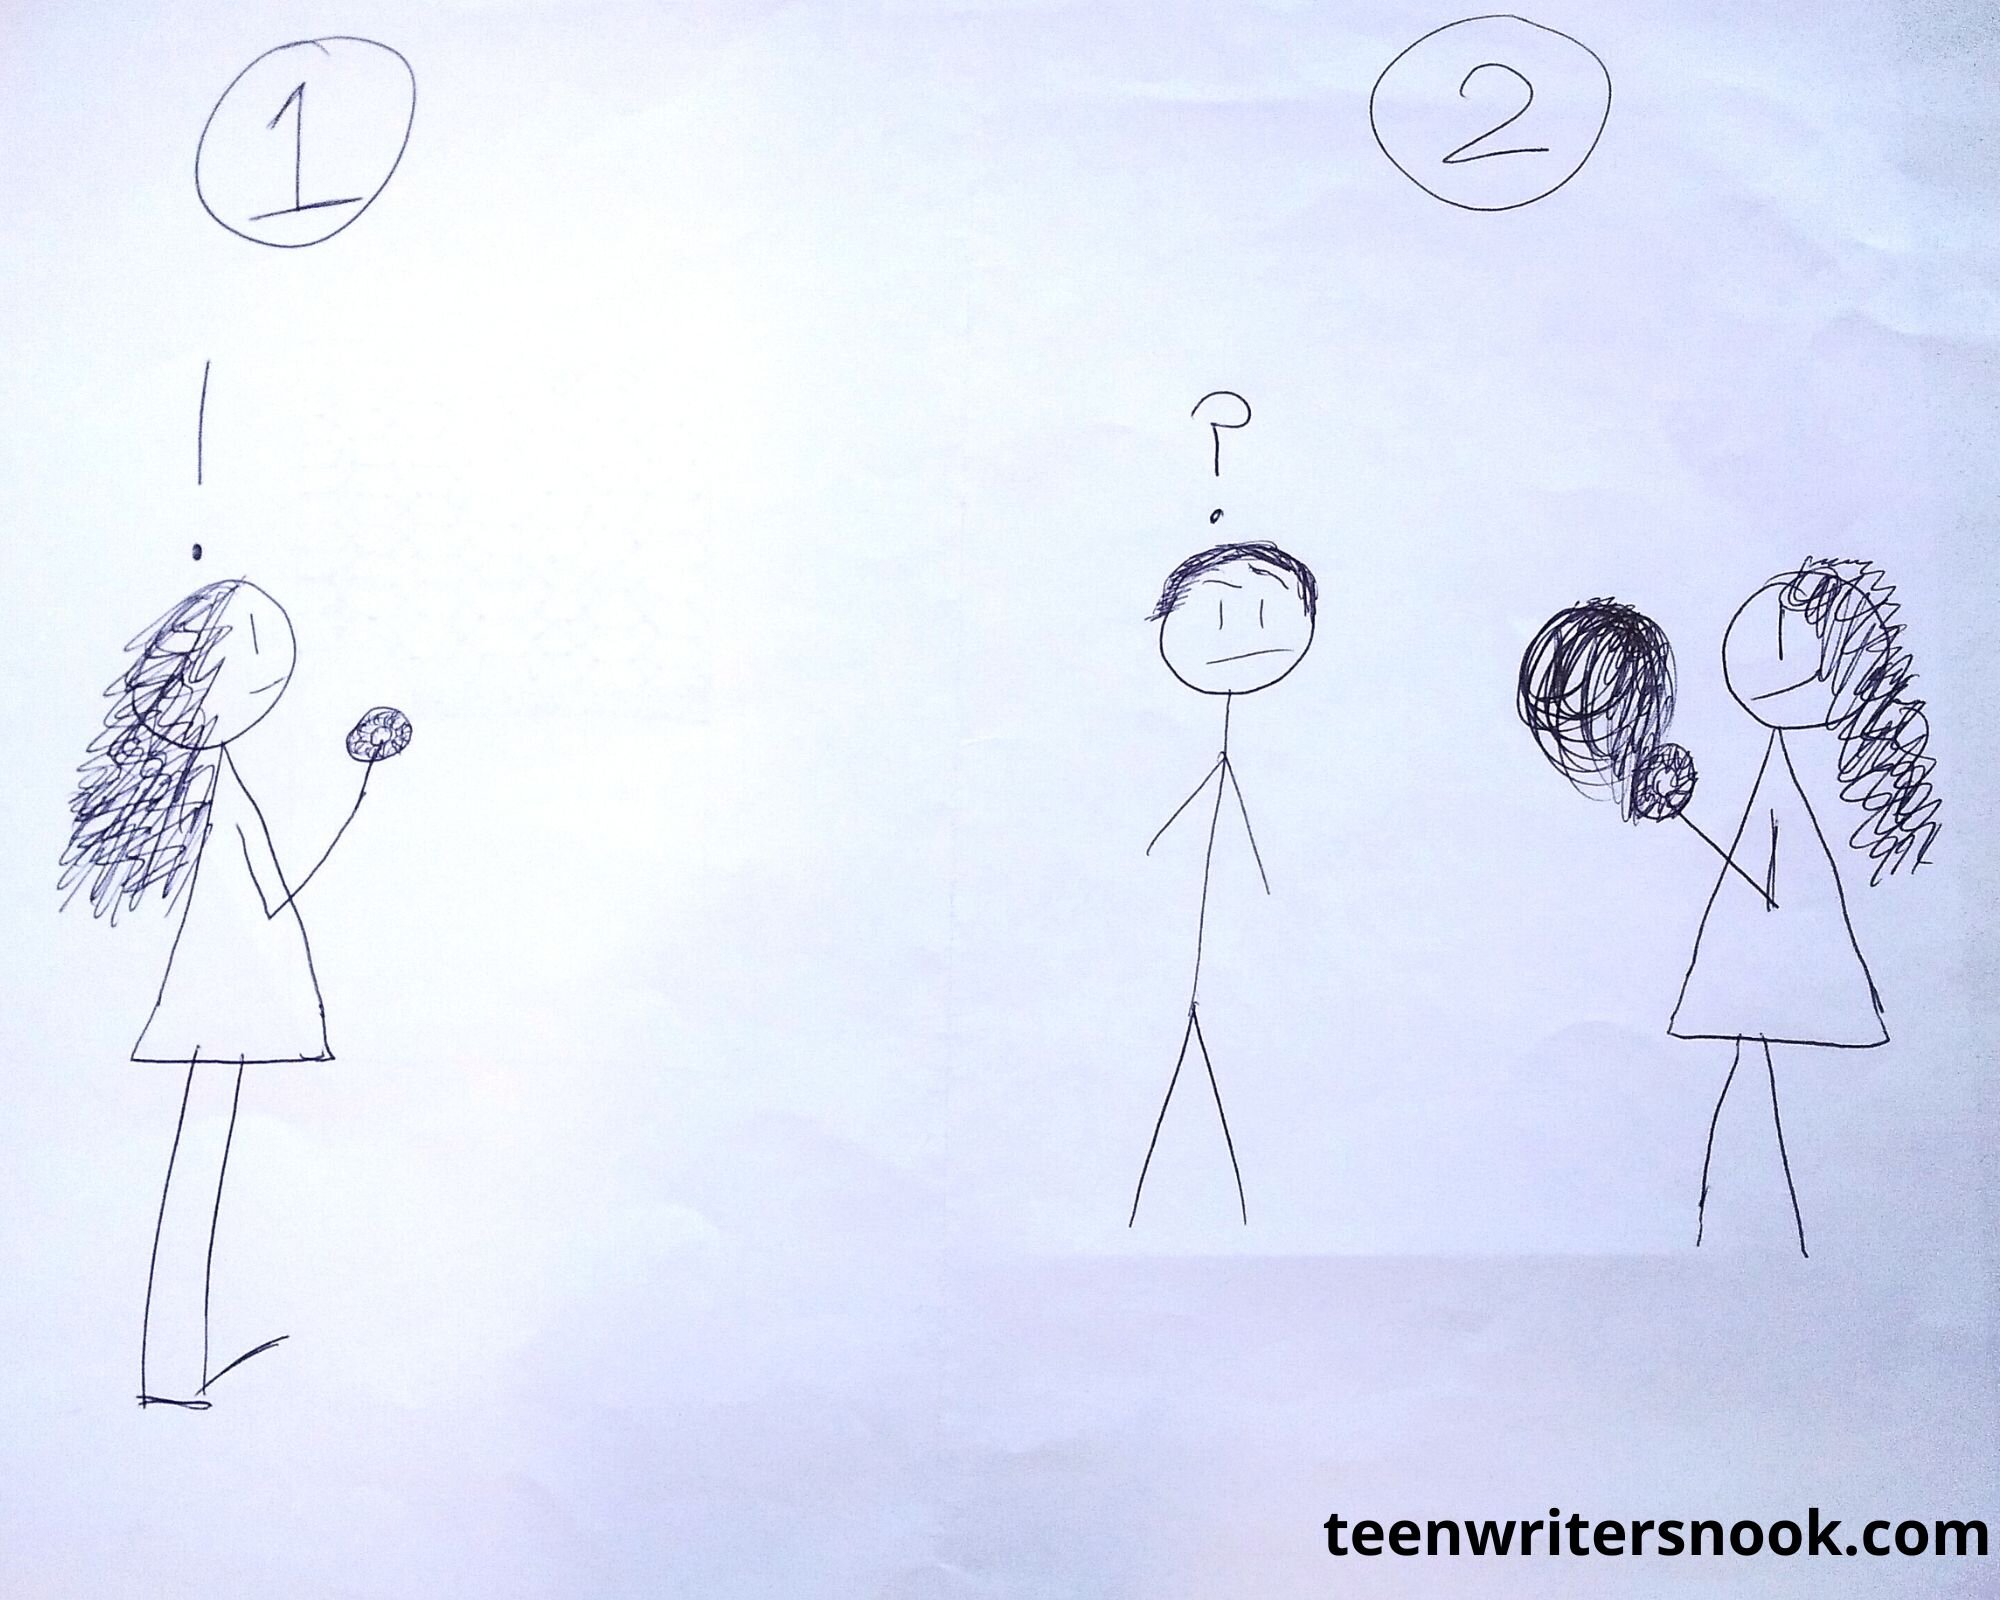
This first one is for my novel, The Black Cat, and it’s extremely simplistic. All I did was draw stick figures to capture the main plot points. (Er, well, the main points before the plot started changing. XD So looking at this storyboard shouldn’t give away any spoilers.
[^That’s Delano in the drawing, by the way. Doesn’t he look funny? XD]
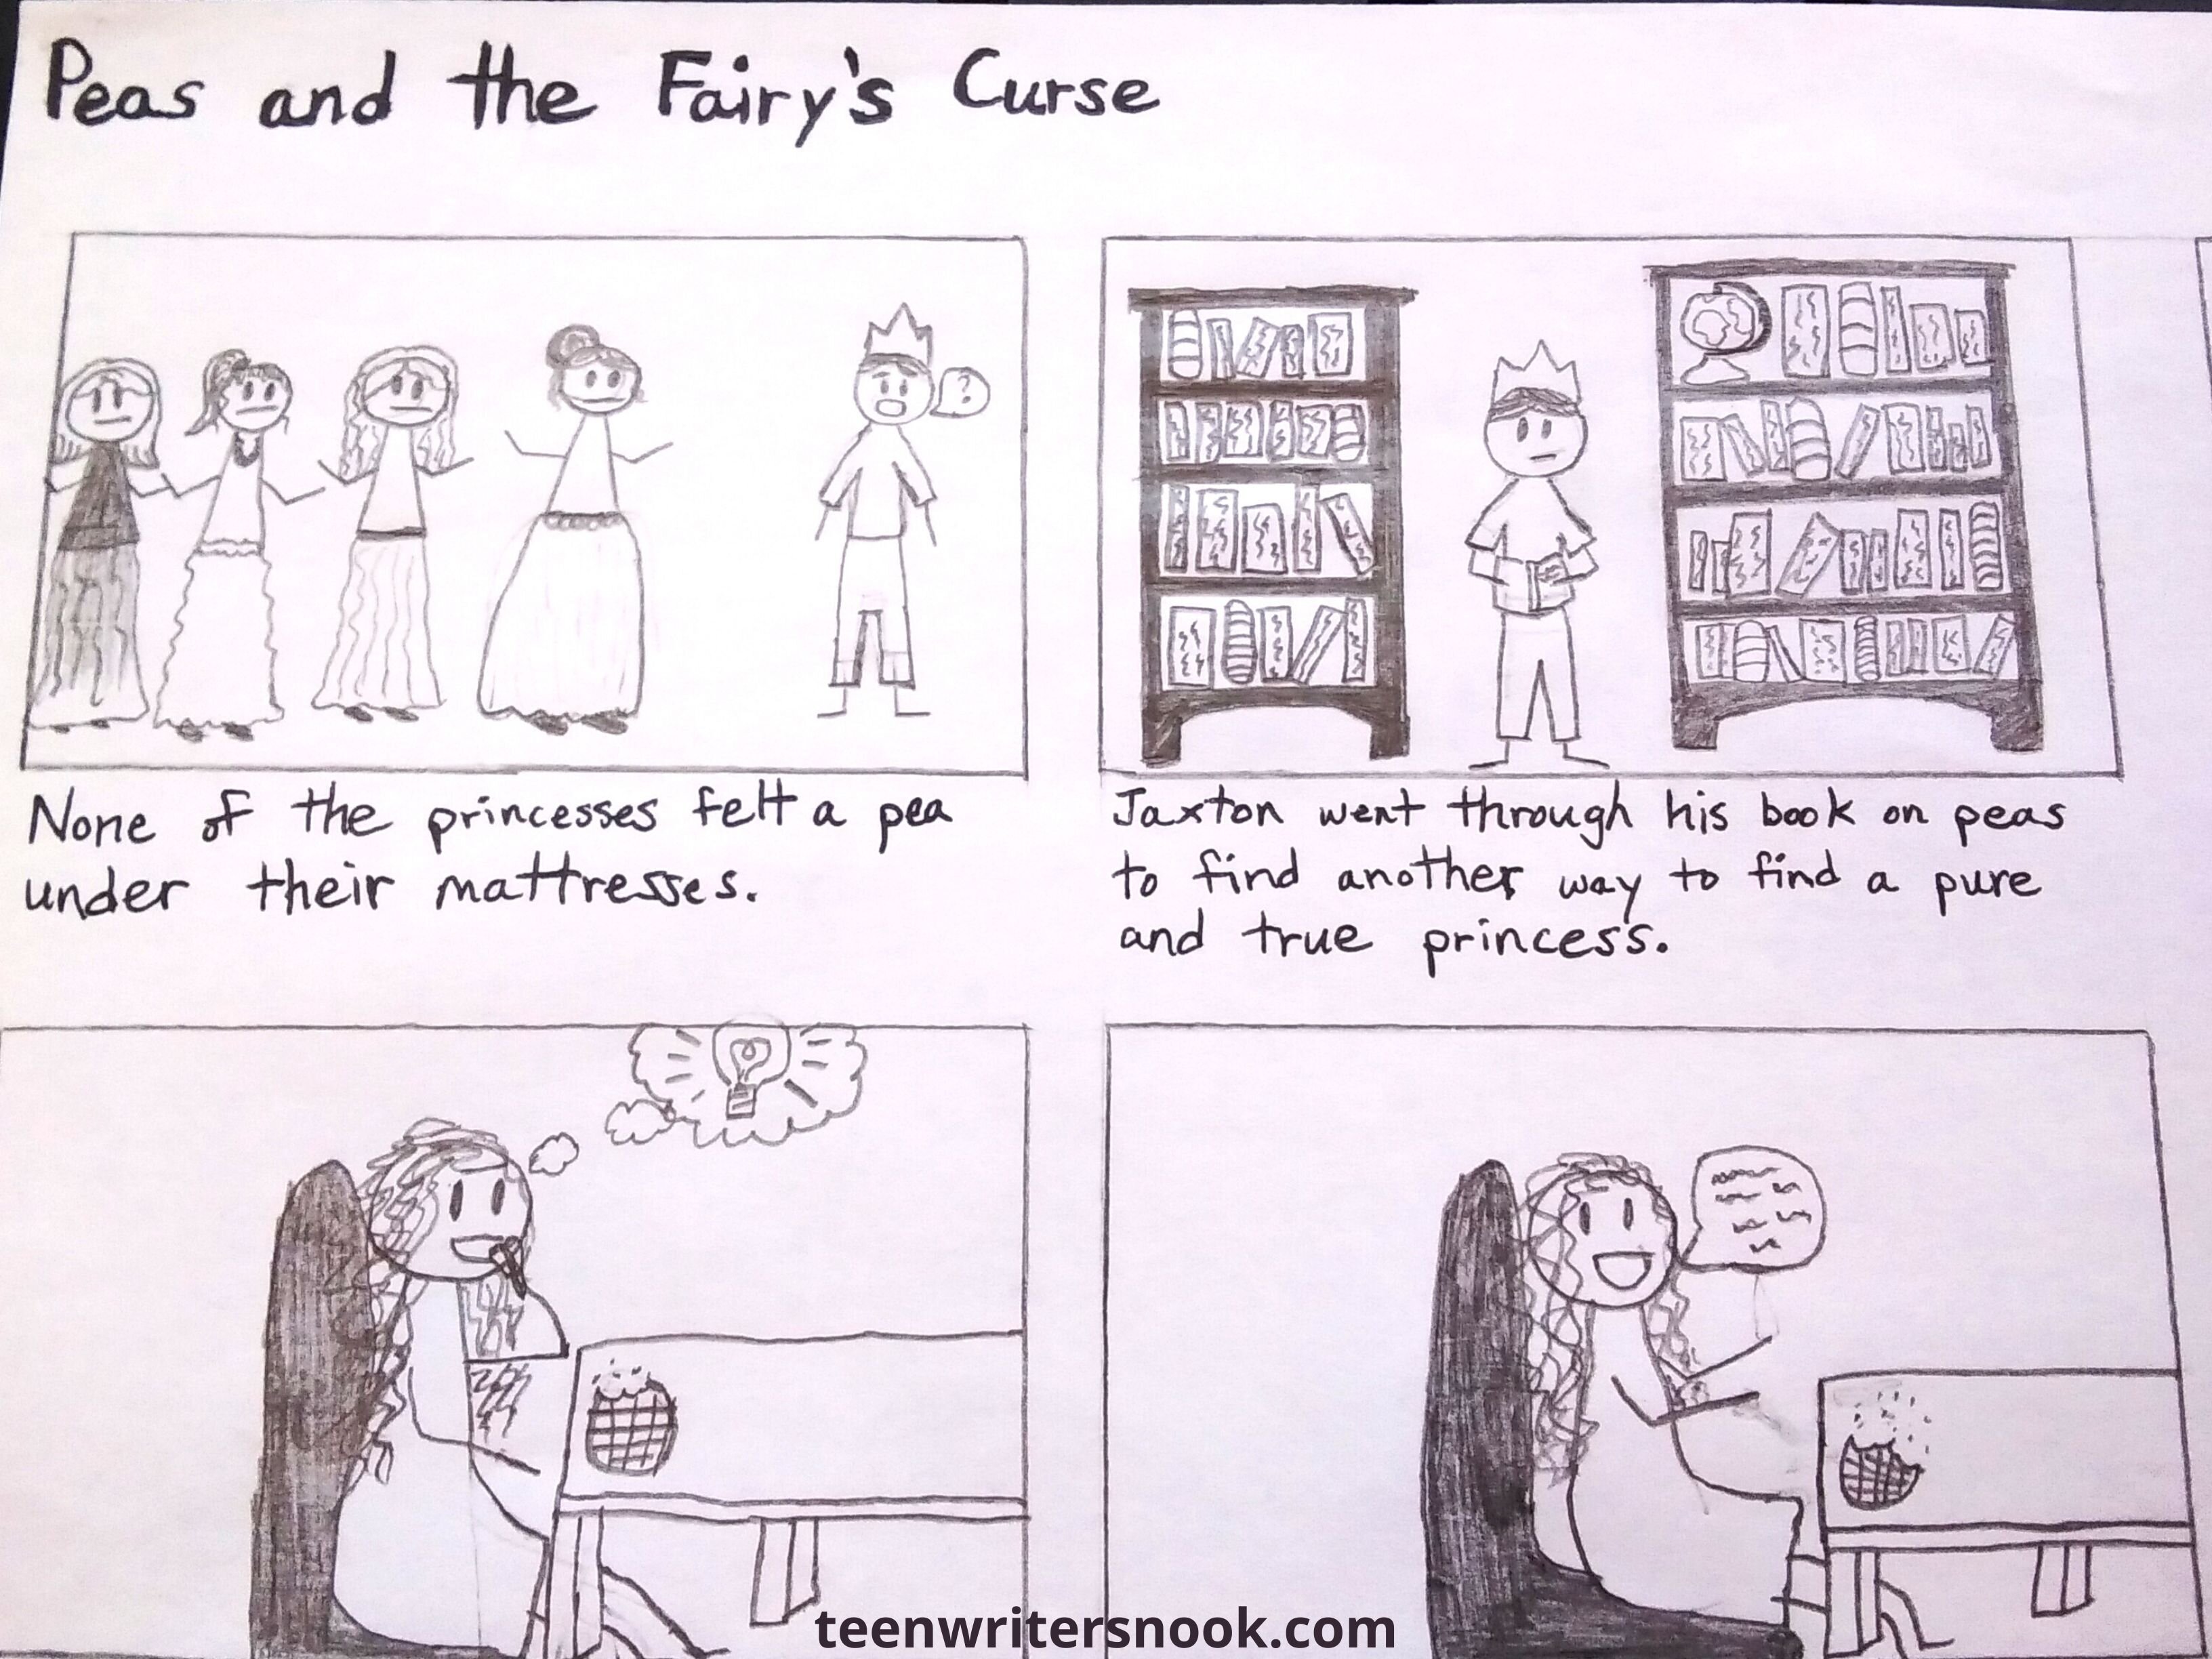
This second one is for a short story I wrote about a year ago called “Peas and the Fairy’s Curse: A Retelling of The Princess and the Pea.” It’s definitely more detailed than my first one and shows pretty much every single scene in the story. (But I’ll only show a portion of it here, so I don’t spoil the story for you.) Before I drew the scenes, I used a ruler to draw the rectangles, which are called “frames” or “panels.” It took more time, but I’m happy with how it turned out.
And those are a couple of storyboard examples. Interested in making your own storyboard? Well, you’re in luck because I’ve created a template for you to download for FREE!!! Click here if you want to download a printable storyboard template. This template already has the frames which will save you a TON of time (trust me! XD), and you can get straight to drawing!
Have you created a storyboard before? If so, how do you like to do it? Drawing? Notecards? Something different? I’d love to hear about it!! (Maybe you’ll give me some new ideas!!
Happy creating and drawing!
~ Katherine


30 Comments
Allie Jo Andersen
This is such a clever and creative idea, Kat!! I’ll have to try it out sometime! Haha I love your story boards, too!!
Katherine
Aw, thank you so much, Allie!!!! I got the idea from my storytelling class I had last year when we learned about storyboards. So I thought it would be pretty cool to talk about it on the blog. Yay, awesome!!! Have fun, and I hope it helps!!!!! Hehe, *sweeps into a bow* why thank you!!!!!
Ava
KATHERINE THIS IS GENIUS THANK YOU!!! I use the 3 act story structure, but my current wip has multiple povs and subplots, so it’s a lot to keep track of! A story board is such a good idea! I’m a super visual person too, so I think this will be super helpful! Thanks again! <333
Katherine
AHHH, THANK YOU SO MUCH, AVA!!!!!!! Oooh, cool!!! I bet that’s very helpful!! Ah, yes, I know what you mean. I like to use multiple POVs as well, and it can definitely be a lot to keep up with. But hopefully, the storyboard will help! Aw, yay, I’m so happy you love the idea!!! Aw, you’re so welcome!!!!!<333 I'm so glad I could help!
Saraina
Brilliant!! I’ve never really tried this before, so I downloaded the templates!!
Katherine
Aww, thank you, Saraina!!!<3 Wow, yay, I'm so excited you actually downloaded the templates!!! It makes me so happy that I could make something that can help others! I hope it helps you plan your novel!<3
Emma
*gasp* I NEVER THOUGHT ABOUT DOING A STORYBOARD FOR MY NOVEL!!!!! This is an epic idea!!! Ahhh I love your drawings!!! XD This is just awesome and thanks for the template!! I’m totally going to use it if I need to visually see my plot points!
Katherine
Haha, good thing I did this post, then! THANK YOU SO MUCH, EMMA!!!!!!!! Awww, thank you!!!!<3 You're so nice!!<3 You're very welcome, girl!!!!! Awesome, sounds good!!! I hope the template works out great!!!
Diamond
This is such a great idea! I don’t think I have the patience to draw out each scene like this, but I might try a simpler version of this!
(I’m not this artistically inclined lol)
Katherine
Thank you so much, Diamond!!!! Haha, yes, I feel ya! I don’t always have a lot of patience either. But it’s a good thing that simpler versions still work!! Awesome!!! I hope you enjoy making your storyboard!!
 )
)
(Haha, I hope the storyboard still helps you with your novel, though.
Joelle Stone
THIS.
IS.
BRILLIANCE.
Katherine
THANK.
YOU.
SO.
MUCH,
JOELLE!!!!!!!!!
That means so much to me!!!!!
Kayti
Oh, that is such a cool idea! I have been bullet pointing, just writing down the events I have and then working towards those goals. It’s helped me stay focused because I actually remember where I wanted the story to go…lol…
Katherine
Aw, thank you so much, Kayti!!!! Oooh, bullet pointing sounds like a great idea!!! It sounds like it would be helpful in pushing past writer’s block since it’s a guide for your story. That’s awesome that it’s helped you!! I’m gonna have to try it out for myself!!! Thanks for sharing!!
Corrie.S.P
Haha, I am guessing he cooked the pea into her waffle?
This is a good idea!
Katherine
Haha, nice guess!!! But it was actually a pie.
Aw, thank you!!!!!
Grace A. Johnson
OOOH! I’m not a huge fan of plotting, so I should definitely look into storyboards!! They look so fun! Thanks so much for sharing, Kat!
Katherine
Yeah, plotting can be a lot of work, lol. Awesome!!! I think you’ll like storyboarding. Yes, they are absolutely so much fun!!! Aww, you are so welcome, Gracie!!!! Thank you so much for reading!!!!<3
Grace A. Johnson
No kidding! XD I think so too! You are SOO welcome! Thank YOU! <333
Katherine
XD Ooh, yay!!! You’ll have to let me know if you give storyboarding a try.
<33333 Awww, you're welcome!!! <333
Grace A. Johnson
I will! <33333
Katherine
Yay, thank you!!!! <33333
OMGoodness this is a wonderful plotting idea!! I think I’m going to try it with one of my WIPS. Thanks for making that box template for us!
Katherine
Awww, thank you SO much, Chole!!!!! I learned about it in a class I had a year ago and thought it was really fun. Ooh, YAY!!!! I hope it helps with your WIP!! Aww, you’re so welcome!!!! I was so happy I could make it for others to use!<33
Alexa
Ooh!!! Katherine, I’ve never used a storyboard to plot my novel before but I LOVE THE IDEA!! I definitely think that I’m more of a visual type person so this will totally make plotting a breeze. THANK YOU for the template!!!! Honestly, without this template I would spend forever trying to draw my own and trying to make the lines perfectly straight (cause I’m one of those people lol), so you are right, I’m going to save lots of time, haha!!! AMAZING POST as always, girl!! Wishing you luck on your WIPs!
Katherine
Aww, THANK YOU!!!! I’m so glad you love the idea! It’s really fun to make! Same! I think I’m more of a visual person as well. Aw, YOU ARE SO WElCOME, GIRL!!!!!!! Haha, I know what you mean. One of the storyboards I made took FOREVER to draw the lines.
 Hehe, but now with the template, we can cheat and just draw the scenes of our story.
 Aw, THANK YOU SO MUCH, ALEXA!!!!! You’re so sweet!!<3 Thank you!! I'm wishing you luck on your WIPs as well!!!
Stanley Keeler
*Meanwhile my ten-page mind map written in messy pen and covered with scribbles*
Katherine
XD Hey, that can still work.
Shanessa
I haven’t been here in forever!!!! Absolutely love it!
Katherine
Ah, I know! It’s been so long since we’ve talked. XD How have you been? Aww, thank you!!!<333 I've missed you, girl!!<333 *hugs*